Hey guys! it's been a while since I've been on this site. I know I don't use this much and I know I don't have many consistent viewers if any. BUT, Embedded below is the stream that I did. I'll eventually build a PC so my streams will be more aesthetically pleasing and more eventful, I swear.
So anyways, enjoy the stream! I may do more in the future, if not tomorrow!

Welcome to my little corner of the internet!
Friday, February 26, 2021
First twitch stream in a while
Wednesday, July 24, 2019
Old XJ-9 Work In Progress 🌟
I have all of my old blog posts privated. Here's some old WIP photos I did of XJ-9, AKA Jenny Wakemen from My Life As a Teenage Robot. I just noticed that this is about the second time that I mentioned her on my blog. I'll use this old WIP to explain my drawing process. I'll probably release a tutorial or another WIP that's up-to-date some time in the future.
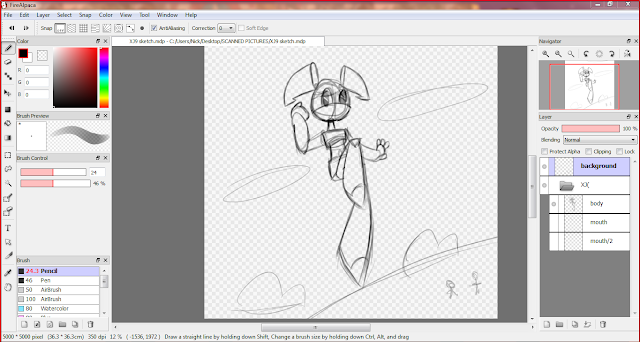
I am using my Wacom Bamboo art tablet and the software I am using is called Fire Alpaca. At the time I was using a Windows 7 Lenovo computer. Fire Alpaca is a great free drawing tool. It can be downloaded HERE. I may also upload my Top 10 free art programs and softwares blog post. I'm super cheap so I tend to make the best out of what I have, and my best comes out great! Anyways, I start out by making super general and bare-minimum shapes that composes the character's basic shape. From there I add a bit more detail and make it look more like the character, still maintaining that sketchy unpolished look to it. When that is done I ended up with the image that I have here. Random fun fact, I'm pretty bad at perspective. I wanted to have Jenny jumping or flying in the air and Brad and Tuck would be waving to her. They were suppose to be the two little stick figures on the ground.
I don't have any photos of this, but when I am done with the sketch I lower down the opacity on the sketch layer, create a new layer for line art, lower down the sensitivity/resistance of the brush, and outline the character to create line art.
 I know I took a massive jump. but I didn't have much screenshots apart from these. Once I complete the line art, I save the image as a PNG and import it into Gimp. Gimp is also a free software which is more for editing photos. It's a great alternative to Adobe Photoshop. If you want to do graphic design, drawings, or photo editing, Gimp is a great software to get your feet wet. It can be downloaded HERE.
This is where I added some color, some shine, and some shading. For shading I believe I used both a combination of a soft brush with a low black opacity (Which is apparently a no-no when it comes to shading) but in this case I feel like it worked great. Drew and coloured a background, used a preset brush to create some clouds, and then I get the finished product as shown below.

🌟Rough Sketch🌟

I am using my Wacom Bamboo art tablet and the software I am using is called Fire Alpaca. At the time I was using a Windows 7 Lenovo computer. Fire Alpaca is a great free drawing tool. It can be downloaded HERE. I may also upload my Top 10 free art programs and softwares blog post. I'm super cheap so I tend to make the best out of what I have, and my best comes out great! Anyways, I start out by making super general and bare-minimum shapes that composes the character's basic shape. From there I add a bit more detail and make it look more like the character, still maintaining that sketchy unpolished look to it. When that is done I ended up with the image that I have here. Random fun fact, I'm pretty bad at perspective. I wanted to have Jenny jumping or flying in the air and Brad and Tuck would be waving to her. They were suppose to be the two little stick figures on the ground.
I don't have any photos of this, but when I am done with the sketch I lower down the opacity on the sketch layer, create a new layer for line art, lower down the sensitivity/resistance of the brush, and outline the character to create line art.
🌟Line Art, Colour, Shading🌟

This is where I added some color, some shine, and some shading. For shading I believe I used both a combination of a soft brush with a low black opacity (Which is apparently a no-no when it comes to shading) but in this case I feel like it worked great. Drew and coloured a background, used a preset brush to create some clouds, and then I get the finished product as shown below.
🌟Finished Product🌟
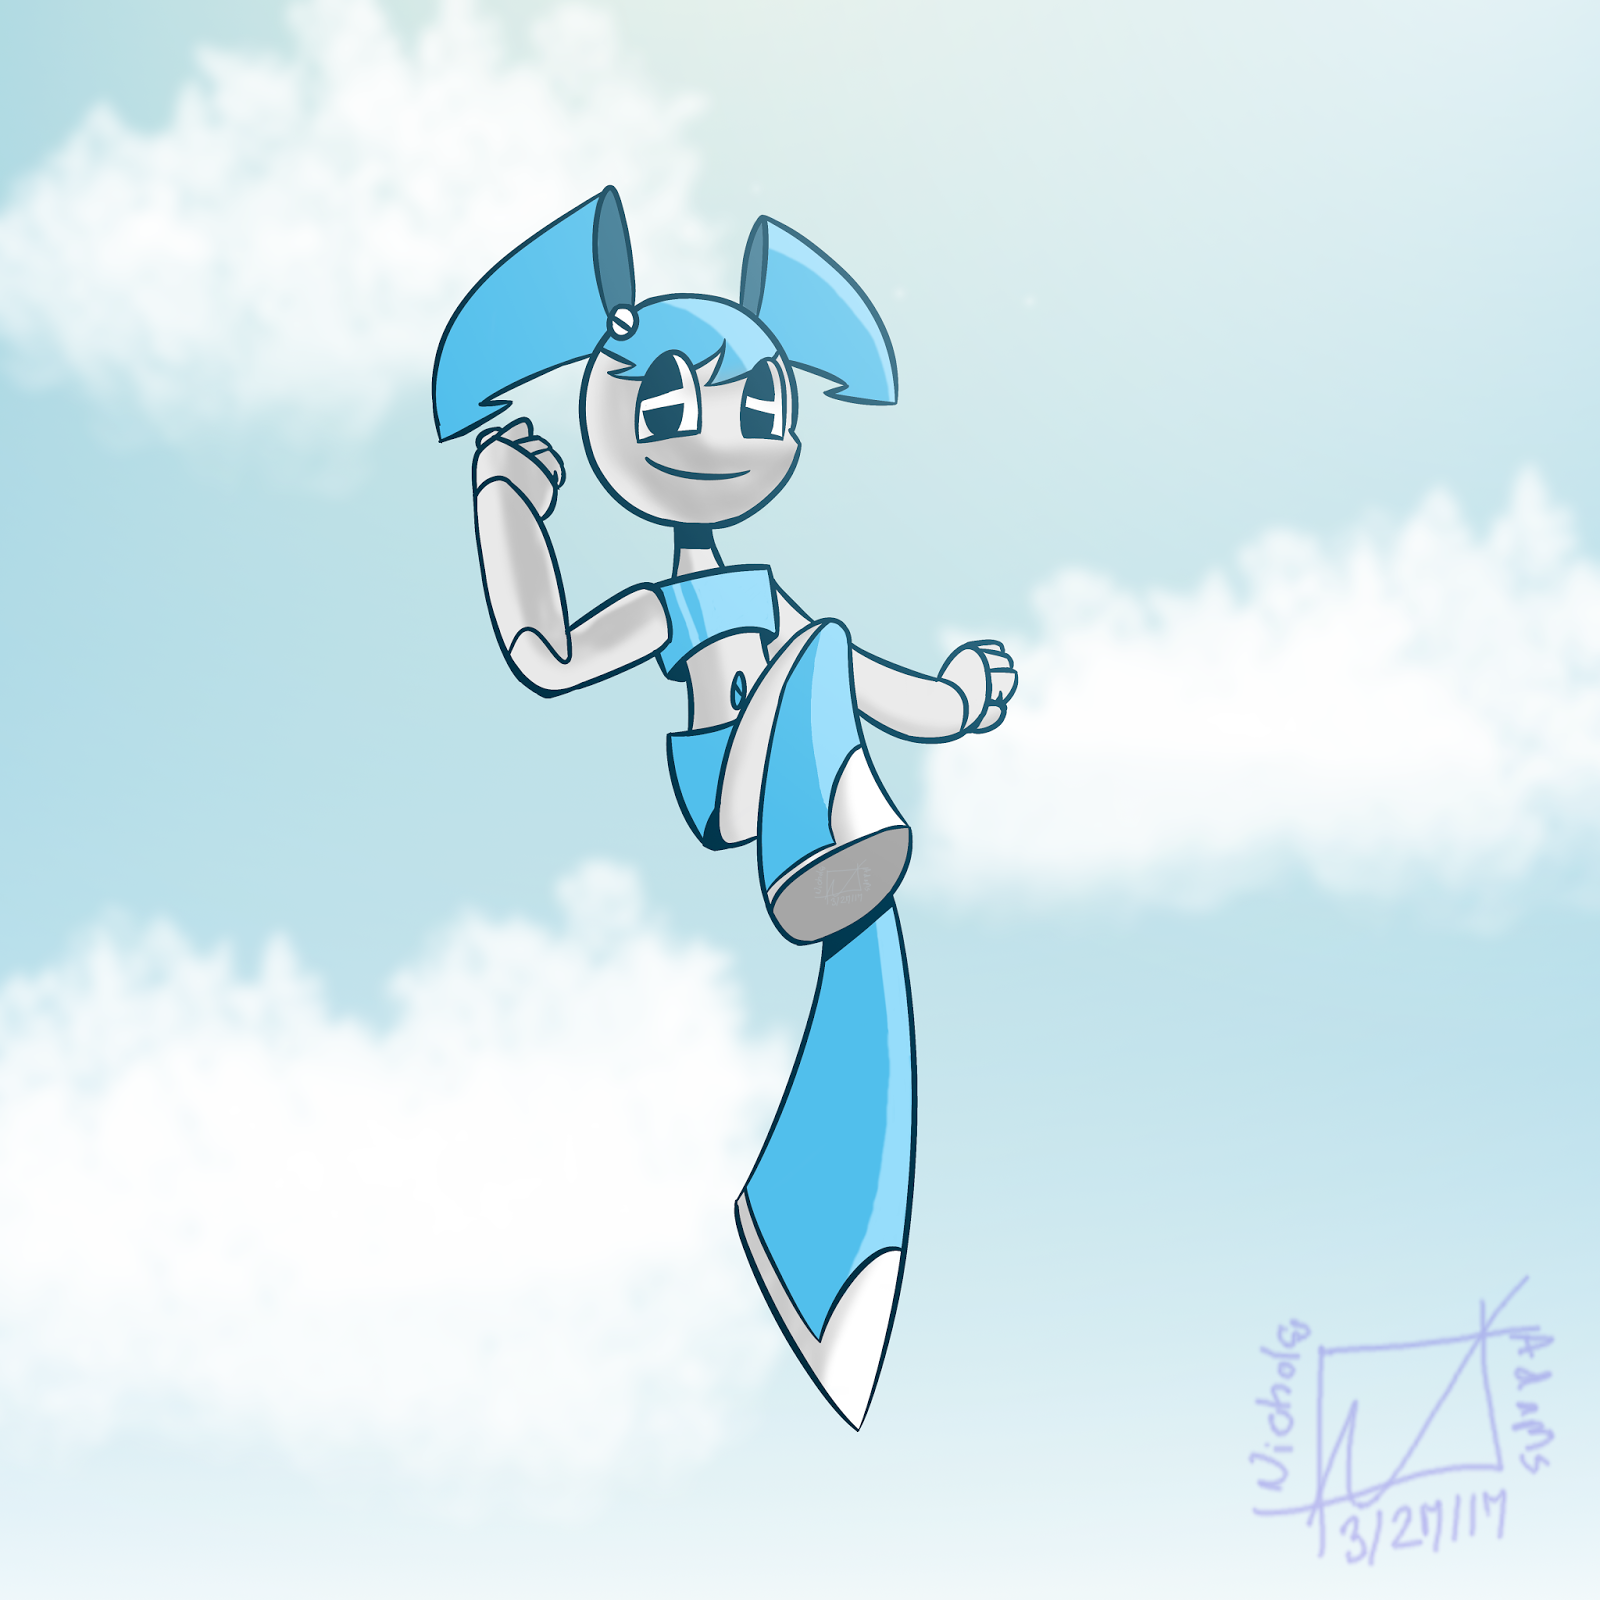
Once I added the background, voilà, that's it! The signature on the bottom right is old. Believe it or not I don't really have a signature that I would consider permanent. However, most of my signatures do have that box with the letter "N" in it. From what I remember, this drawing took about 2 days and about 2-4 hours each day. Over all I was pretty happy with the drawing ✨